Imports
General
The sales import is the process of importing sales data into the system, which can be done manually or automatically via an API. The imported sales data is then used to calculate royalties and generate statements for licensors.
List view
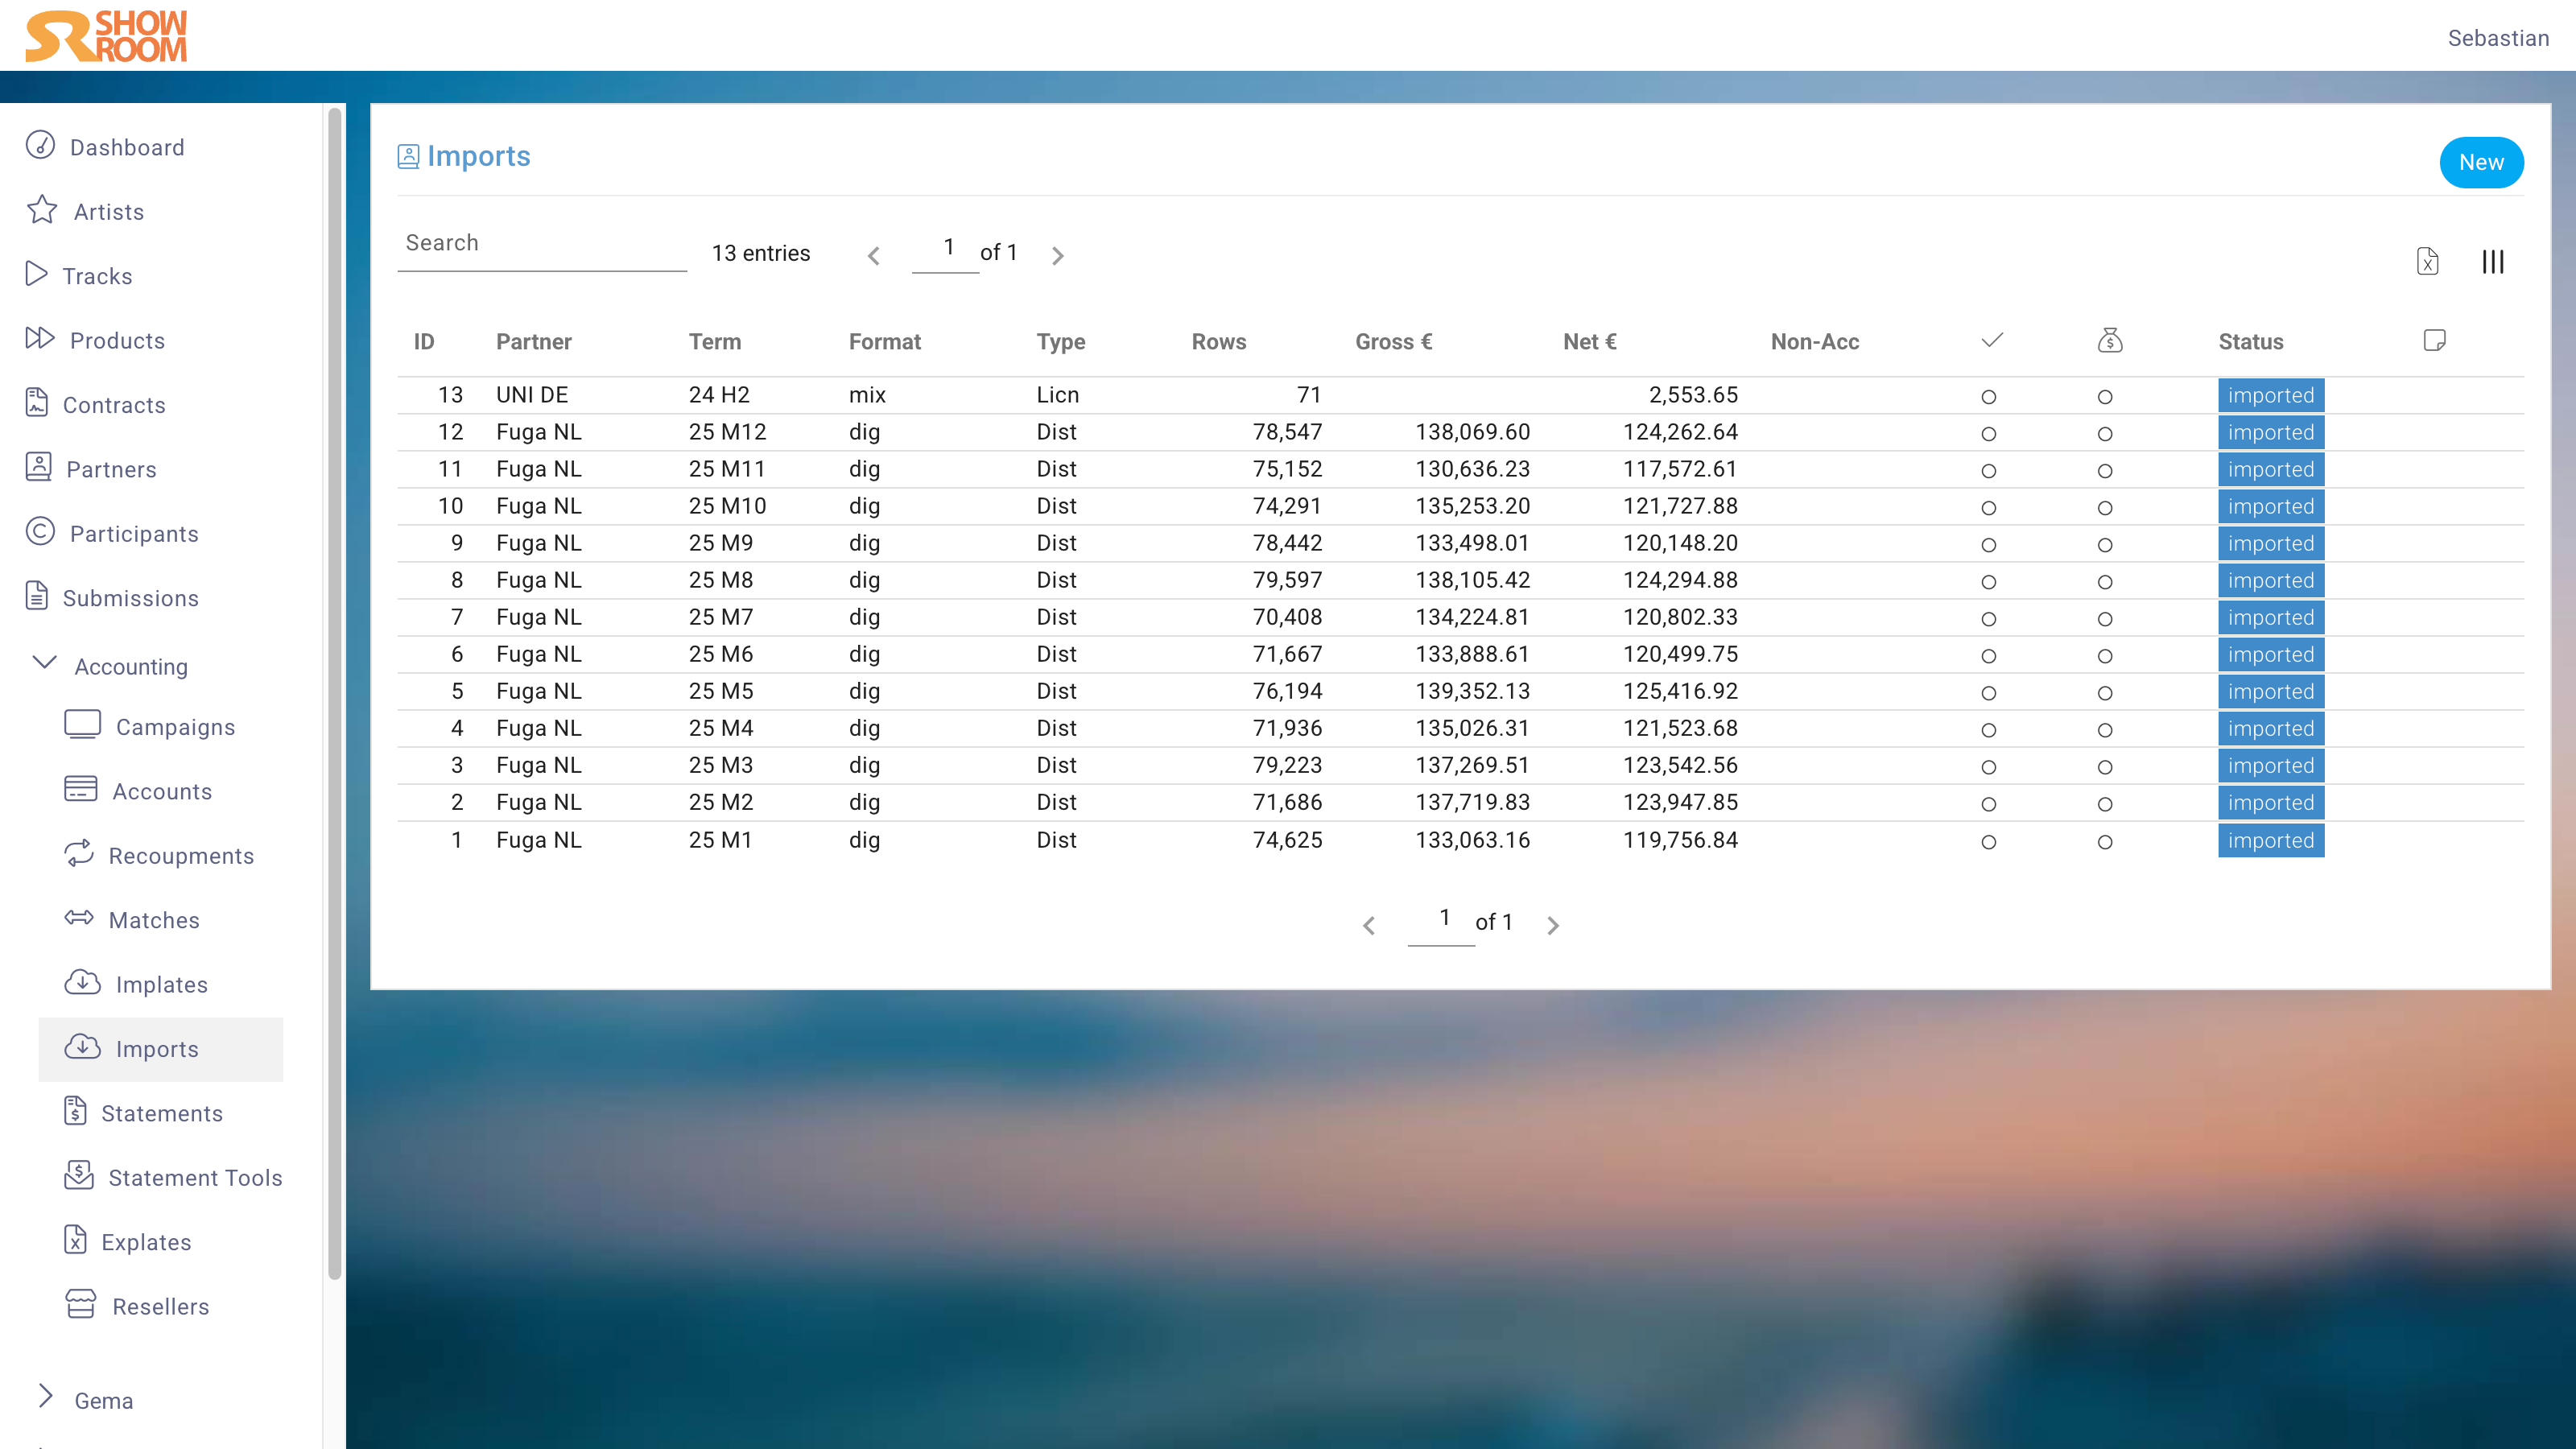
The List View displays all Imports in a tabular format, allowing you to quickly see the details of each Import, such as the term, type, and status.
Create View
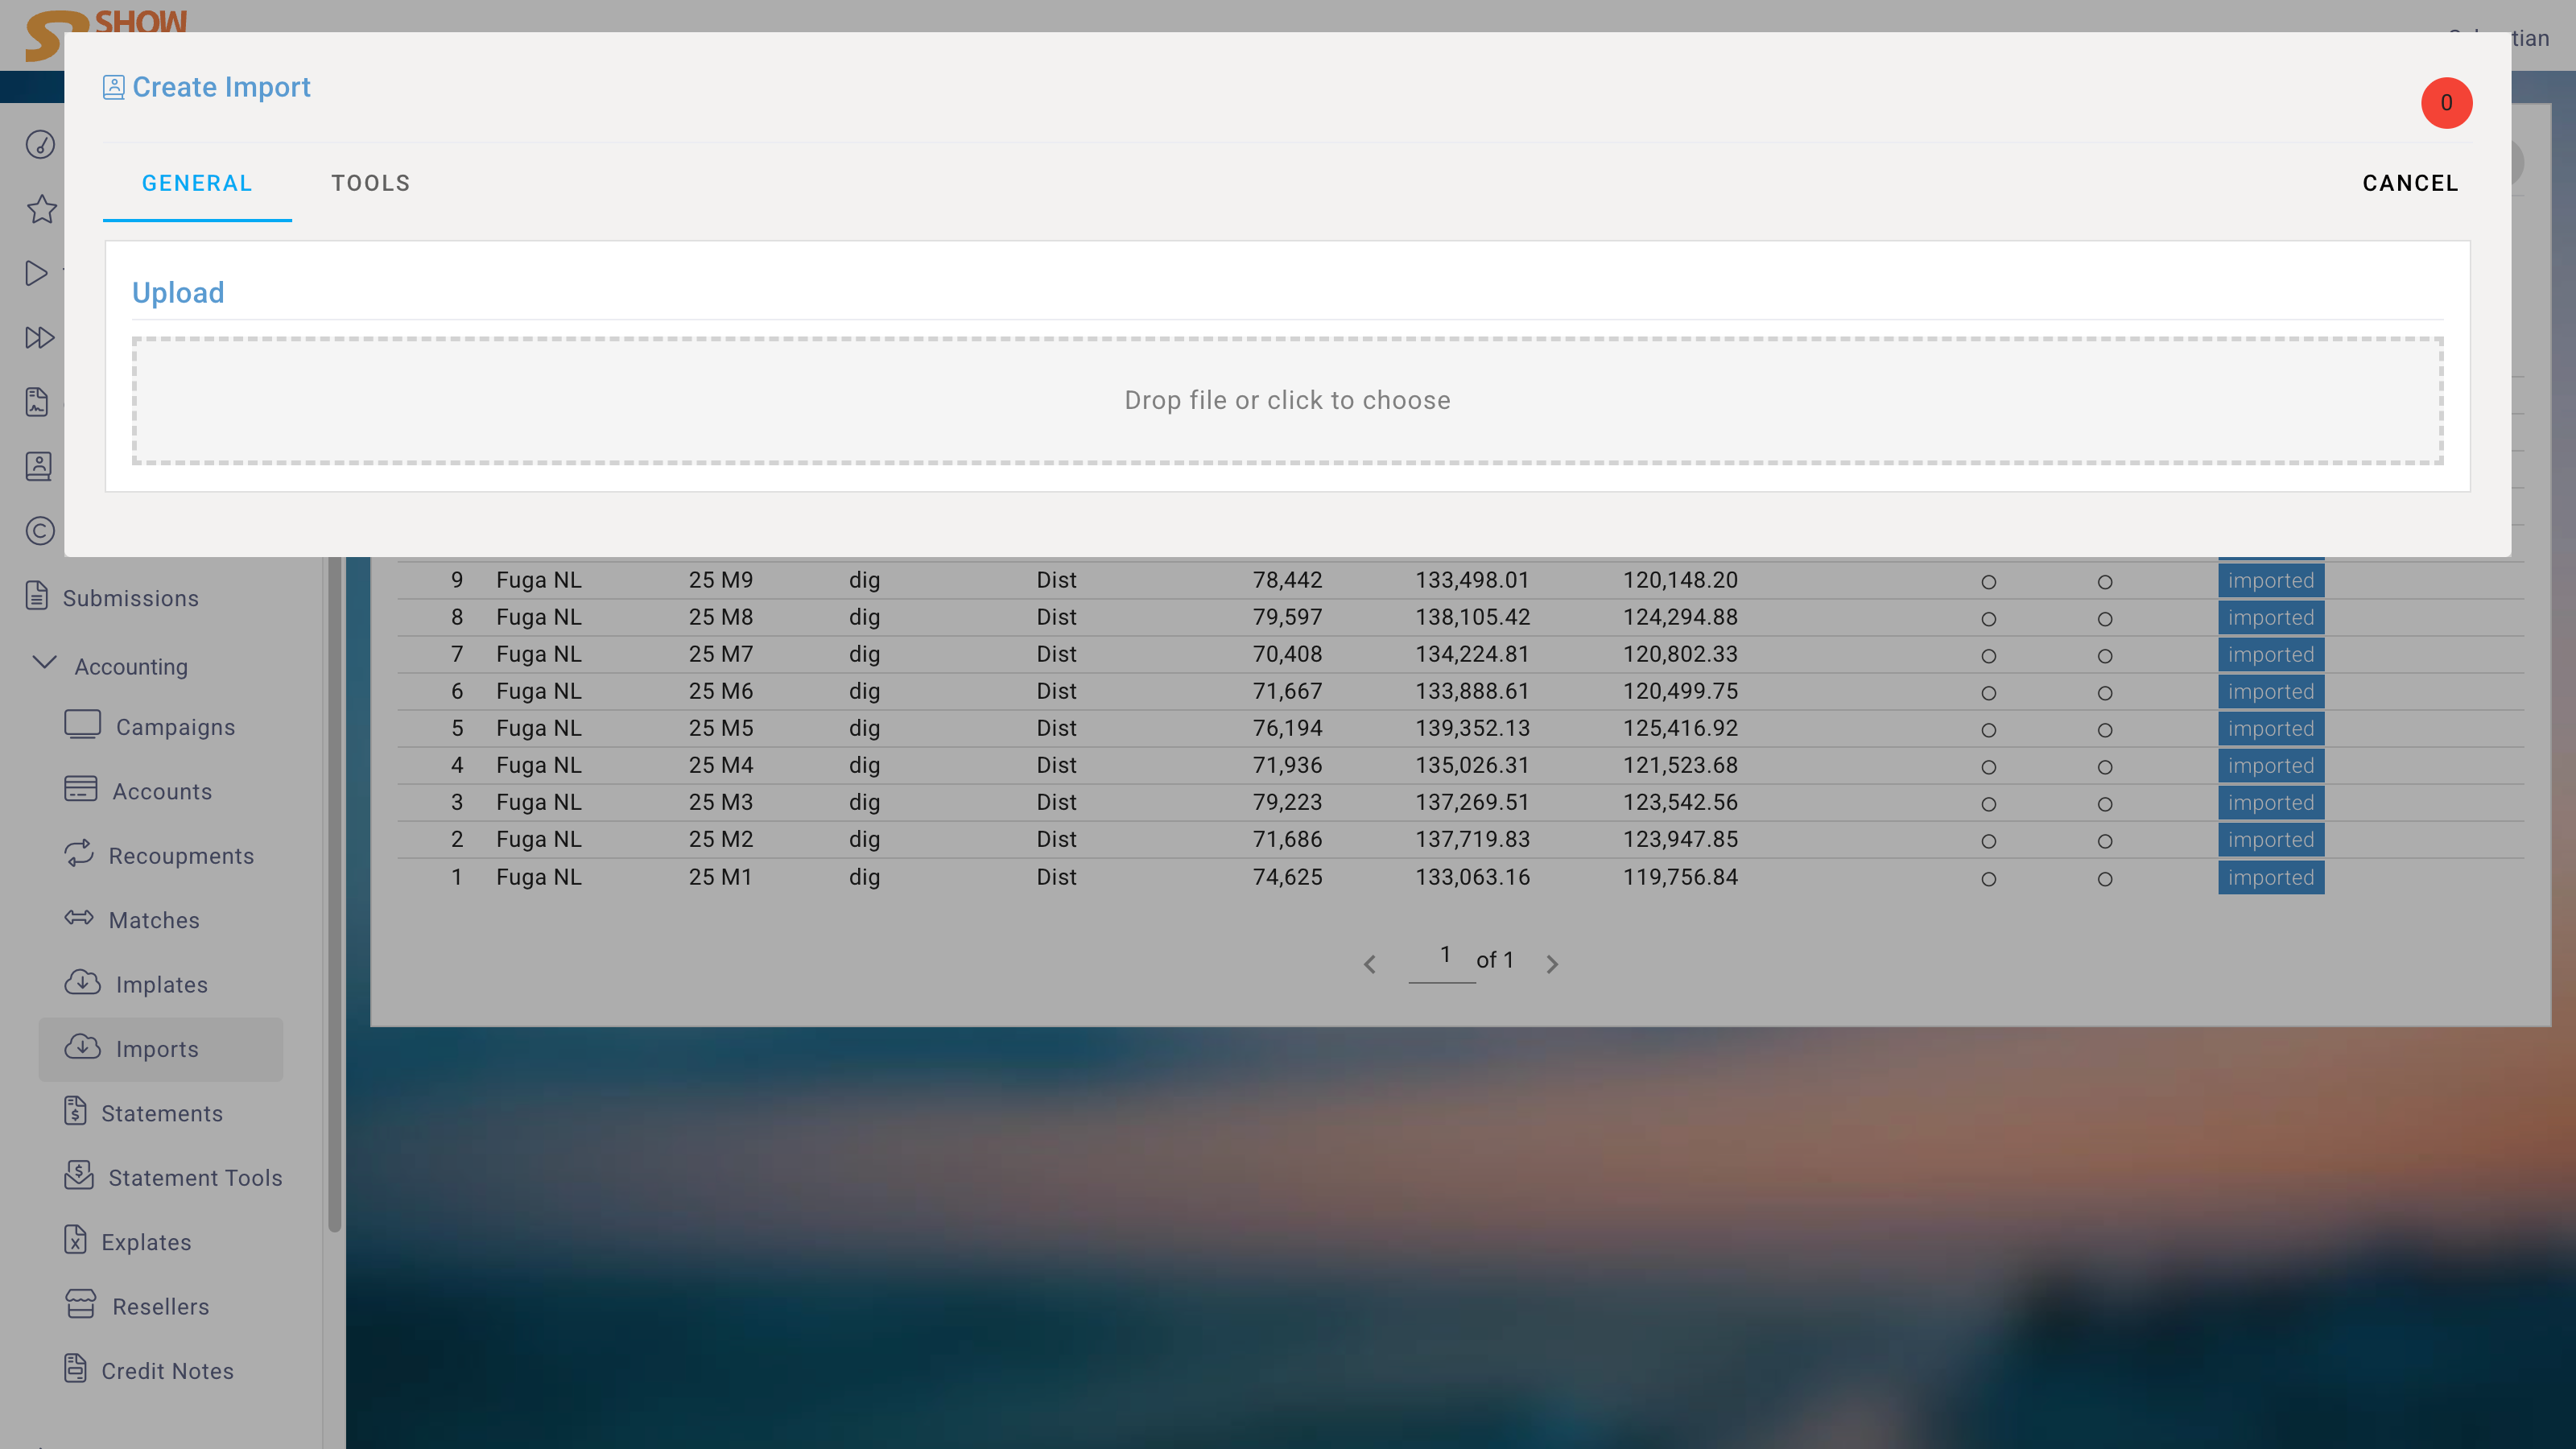
An Import always starts with the sales report file. Drop the file onto the Upload area or click it to choose a file from disk.
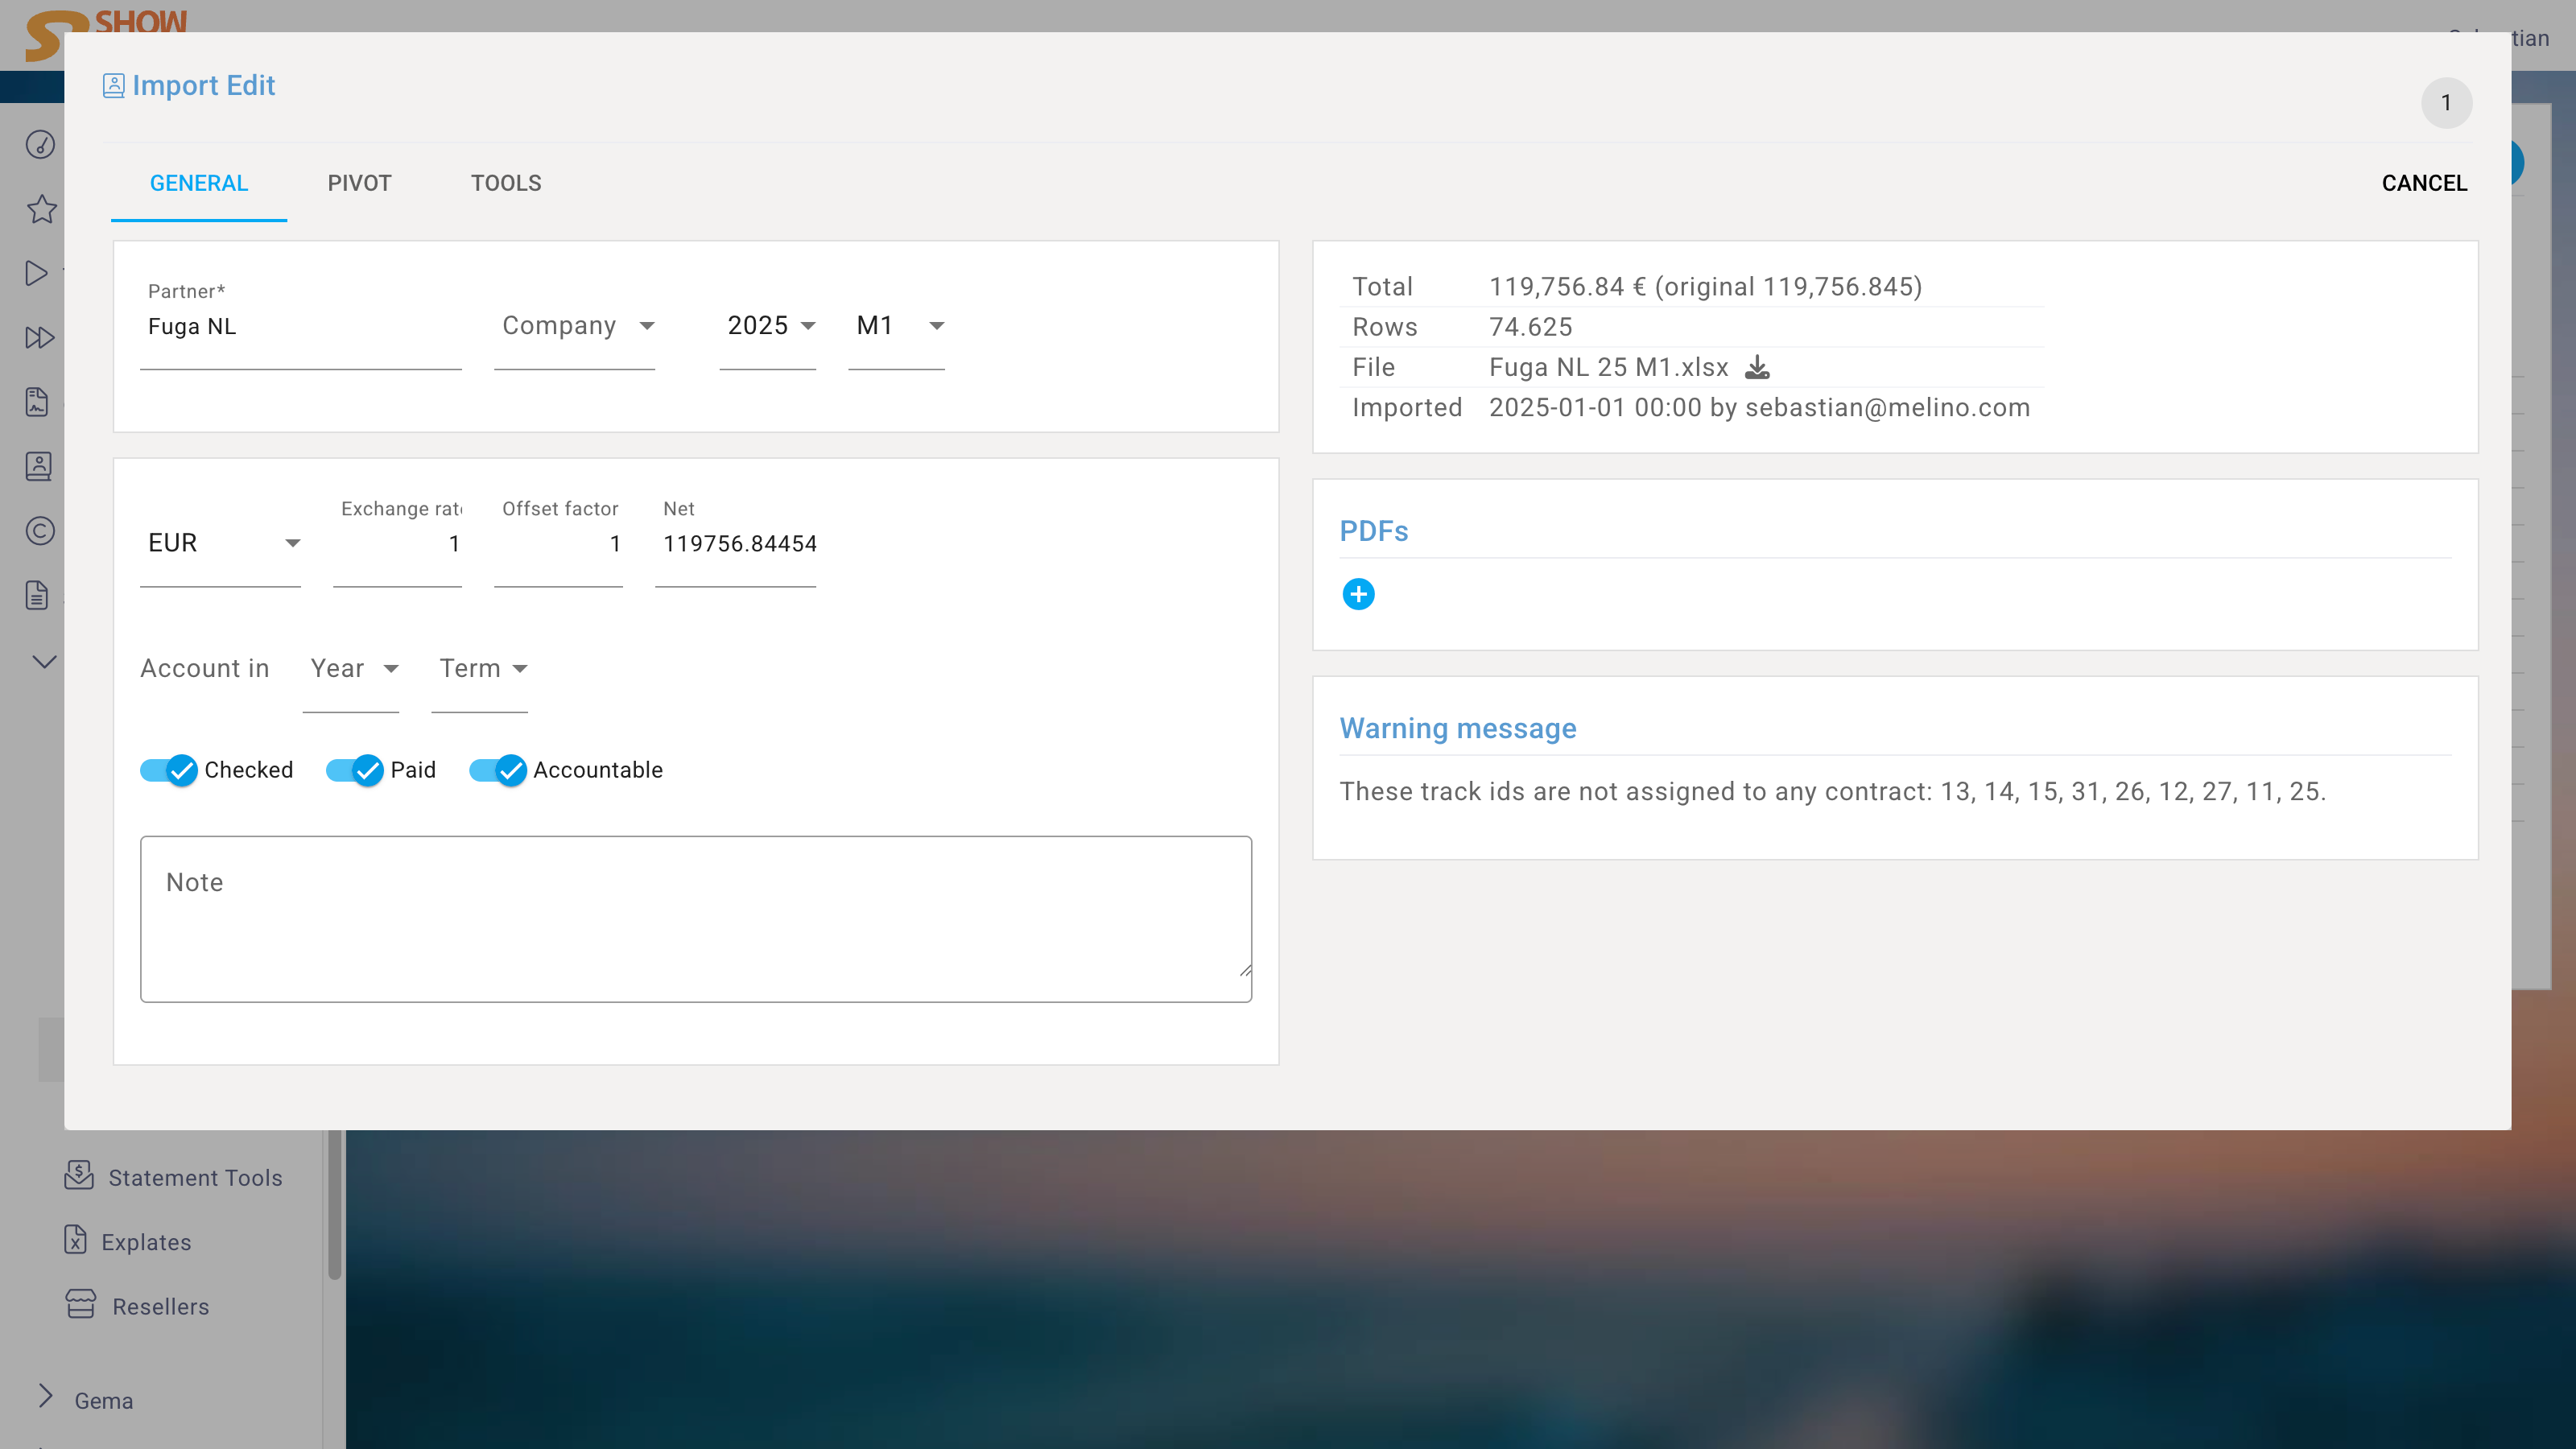
The file itself can have any name. After selecting it, a form appears in which you select the Partner and the term of the report before the upload. The column layout is taken from the Implate of that Partner.
Once uploaded, any Disputes have to be cleared before the sales are actually imported.
File name
If the report files follow the name schema below, melino matches the selections automatically and you only need to click on upload.
[Partner code] [year as YY] [term] [format] [note]| Part | Description | Required |
|---|---|---|
| Partner code | Code of the reporting Partner | Yes |
| year | Year as two digits | Yes |
| term | Term name, e.g. M1 for January, Q1 for the first quarter, H1 for the first half year | Yes |
| format | phy, dig, or mixed. Only needed if the Partner is of the type Third party — for physical and digital distributors the format is already set in the Partner Edit. | No |
| note | A note in brackets, which is saved as the note of the Import | No |
Examples:
- simple:
UNI DE 26 H1 - all options:
UNI DE 26 H1 dig (Correction)
It is best practice to use this name schema when storing the files as well, so they can be uploaded and imported without entering any data, with the added benefit of consistent sorting.
Edit View
Partner
In the Import Edit View, you first confirm the Partner (here, Reporter).
Company
If more than one Company is configured in the instance, one of the Companies can be selected as the recipient. There are two reasons for this:
- Contracts assigned to one Company ignore sales from other Companies in the Contracts.
- Reporting may later require the ability to analyze data separately for each Company.
Year and term
For the term, select the year and the period in which the reported sales occurred.
Currency
The currency is the one in which the report was generated. If the file to be imported contains US dollar amounts, USD must be selected here. If the instance is configured in, for example, euros, the exchange rate is automatically converted, using the last day of the report period as the reference date.
Exchange rate
The exchange rate can also be set manually. You can enter it numerically or simply enter the net total, i.e., the amount that actually arrived in the bank account. The exchange rate will then be calculated and set automatically in real time.
Offset factor
The offset factor allows you to change all imported amounts by any desired factor. At a factor of 0.5, all amounts would be halved; at a factor of 1.2, they would be increased by 20%.
Checked & Paid
The Checked and Paid markers help maintain an overview of the Imports in daily work. They have no further effect, meaning that Imports not marked as Checked or Paid will still be billed.
PDFs
It is good practice to upload the cover sheets of the sales reports here, as well as any correspondence as PDFs, for quick access later. Often, the reason for an offset is only apparent from the cover sheet.
Error report
If the imported sales report contains Tracks or Products that are neither assigned to a Contract nor marked as in-house, they will be listed here.
Disputes
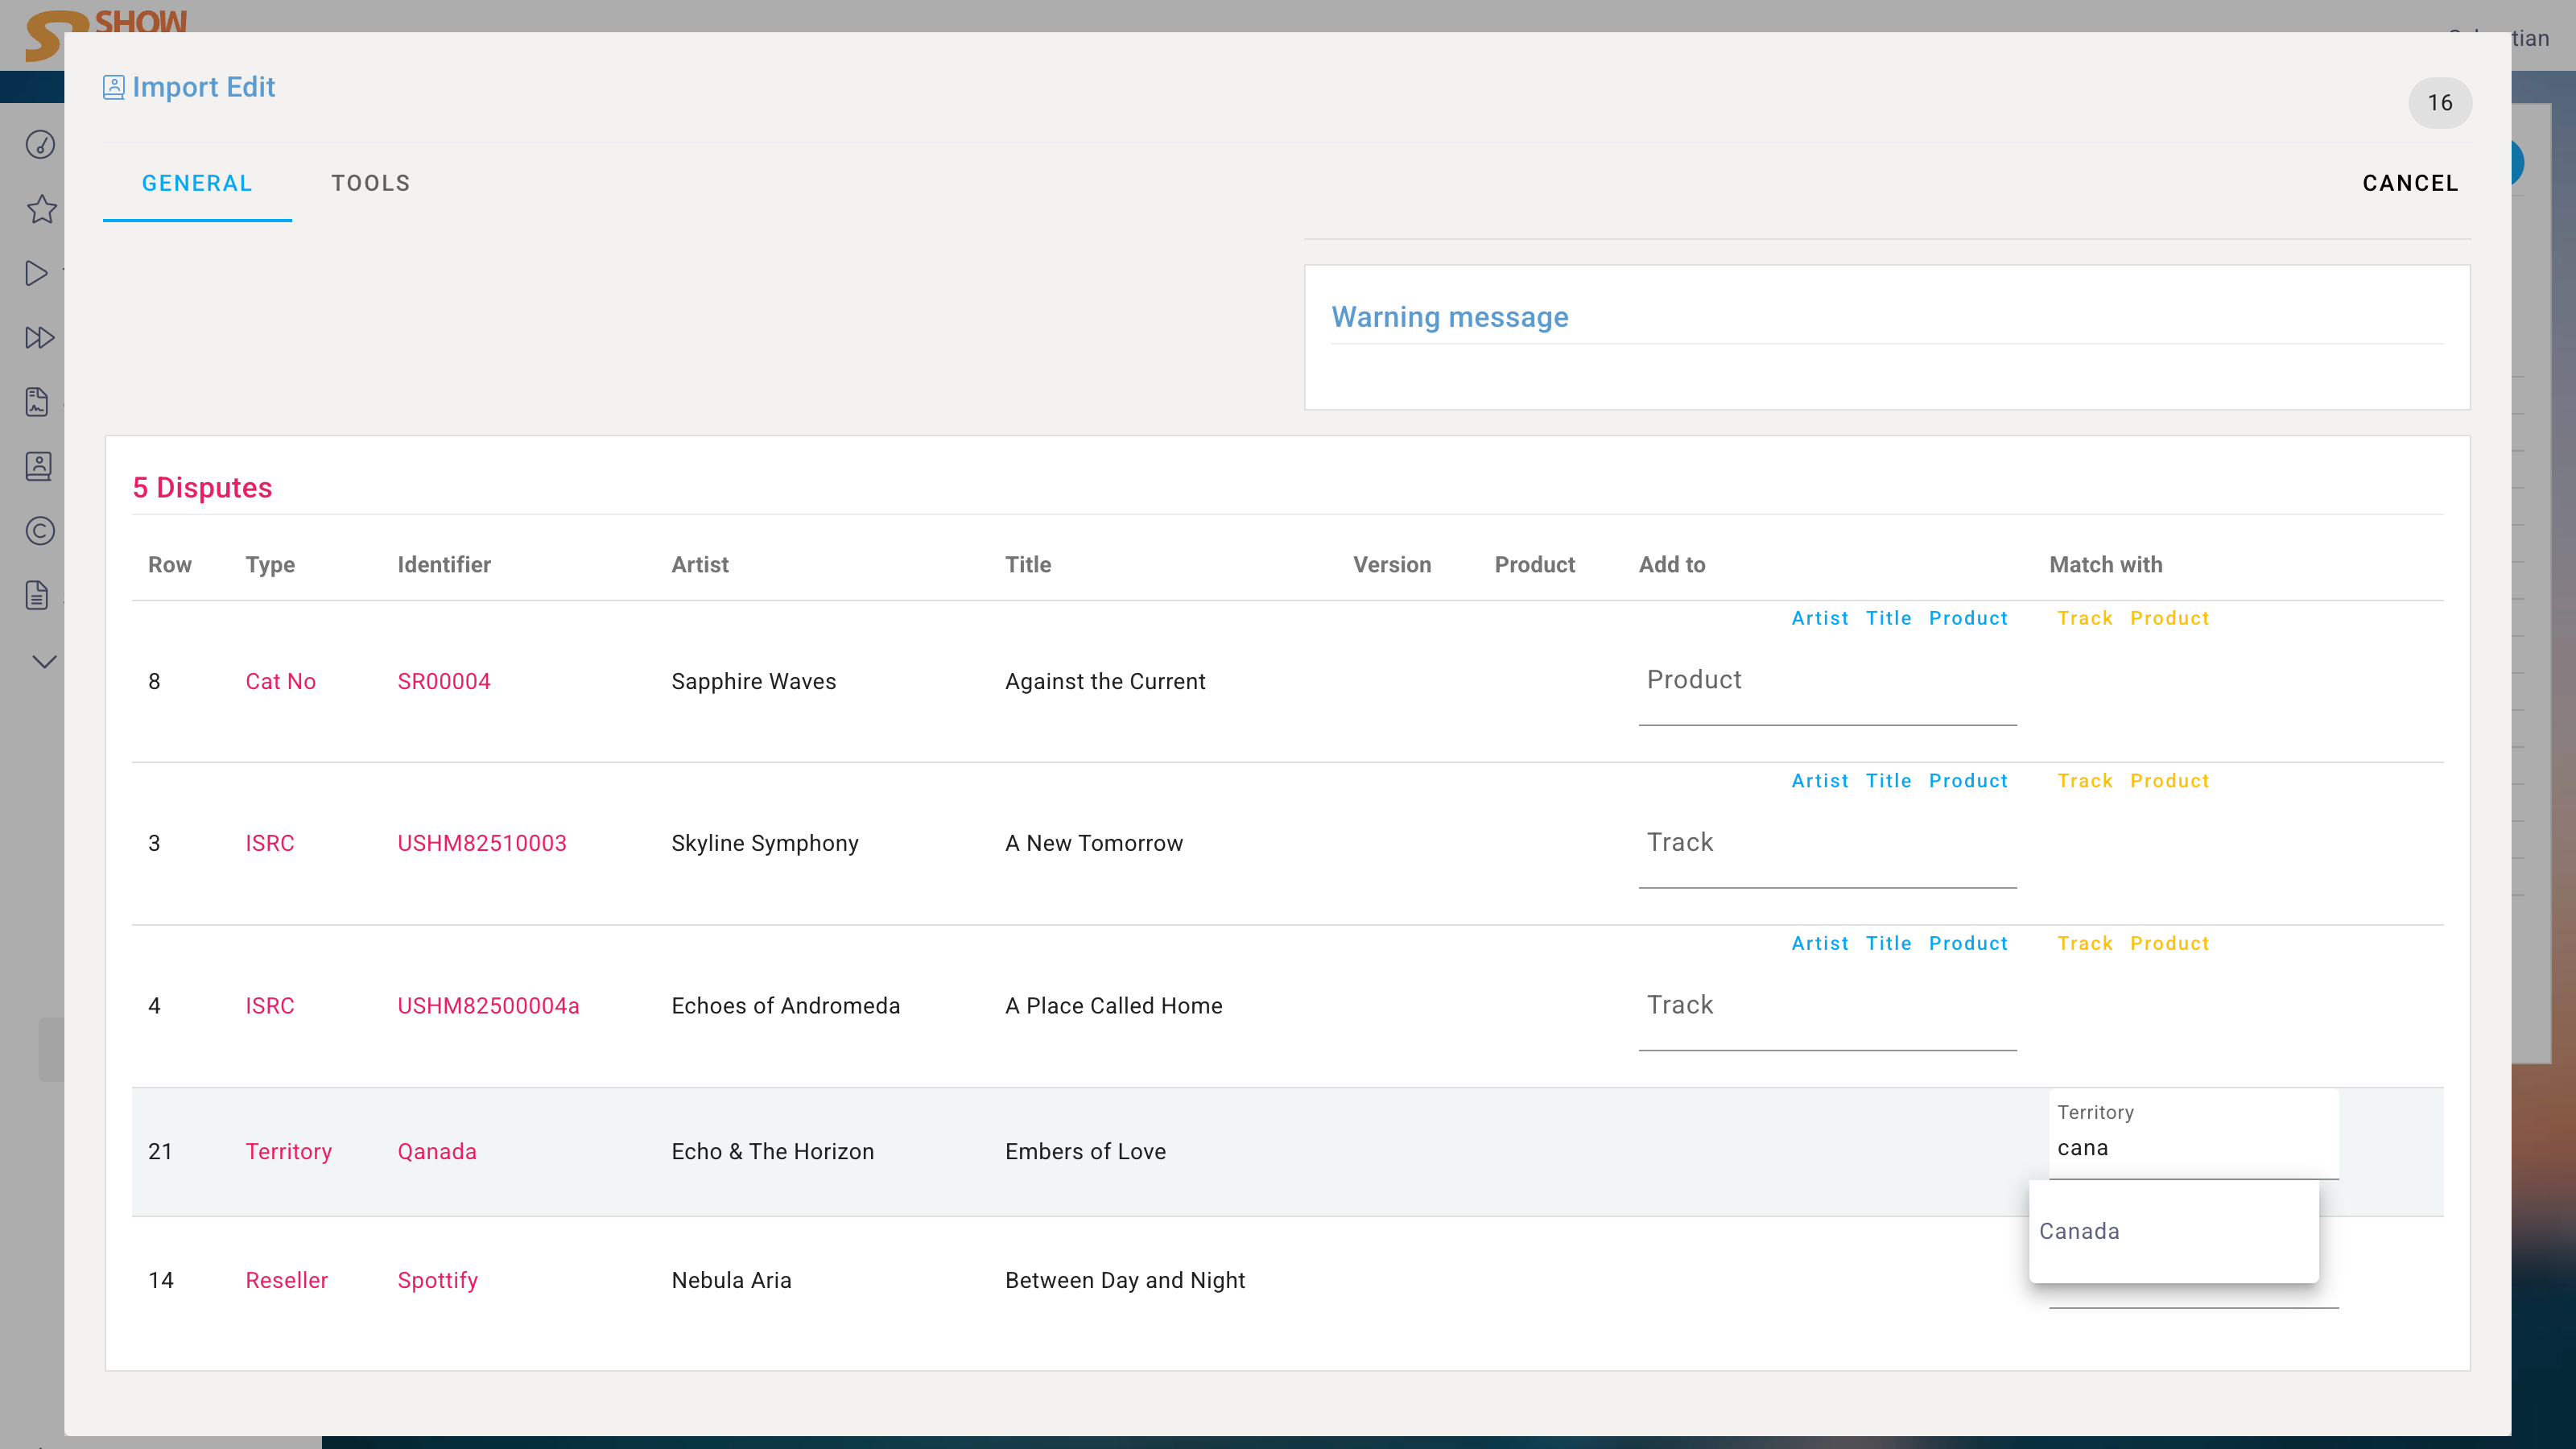
If a sales line cannot be assigned automatically, it is listed as a Dispute.
Disputes block the Import. A report can only be imported once every Dispute has been cleared, so a single remaining Dispute means the entire Import is not accounted for — not just the affected lines. Clearing all Disputes is therefore the first step after the upload.
Each row shows the Row number in the file, the Type of the unresolved value (e.g. ISRC, Cat No, Territory, Reseller), the reported Identifier, and the reported metadata (Artist, Title, Version, Product) as it appears in the file.
There are two ways to resolve a Dispute, corresponding to the two options described under Matches:
- Add to — the reported identifier is written to an existing Track or Product. An ISRC is added to a Track, a catalog number to a Product. From then on the identifier itself is known, and every future report using it is assigned automatically.
- Match with — the reported combination of metadata is saved as a Match. Use this when the identifier should not be written to the asset, for example because the reporter uses their own numbering. Territory and Reseller Disputes are resolved here as well, by picking the correct Territory or Reseller for the reported spelling.
In both columns, start typing into the field and select the correct entry from the suggestions. The small links above each field (Artist, Title, Product for Add to; Track, Product for Match with) prefill the field with the corresponding value from the report, so it does not have to be retyped.

Misspelled Territories and Resellers are handled the same way. In the example below, the report contains "Qanada", which is matched with the Territory Canada.
Pivot table
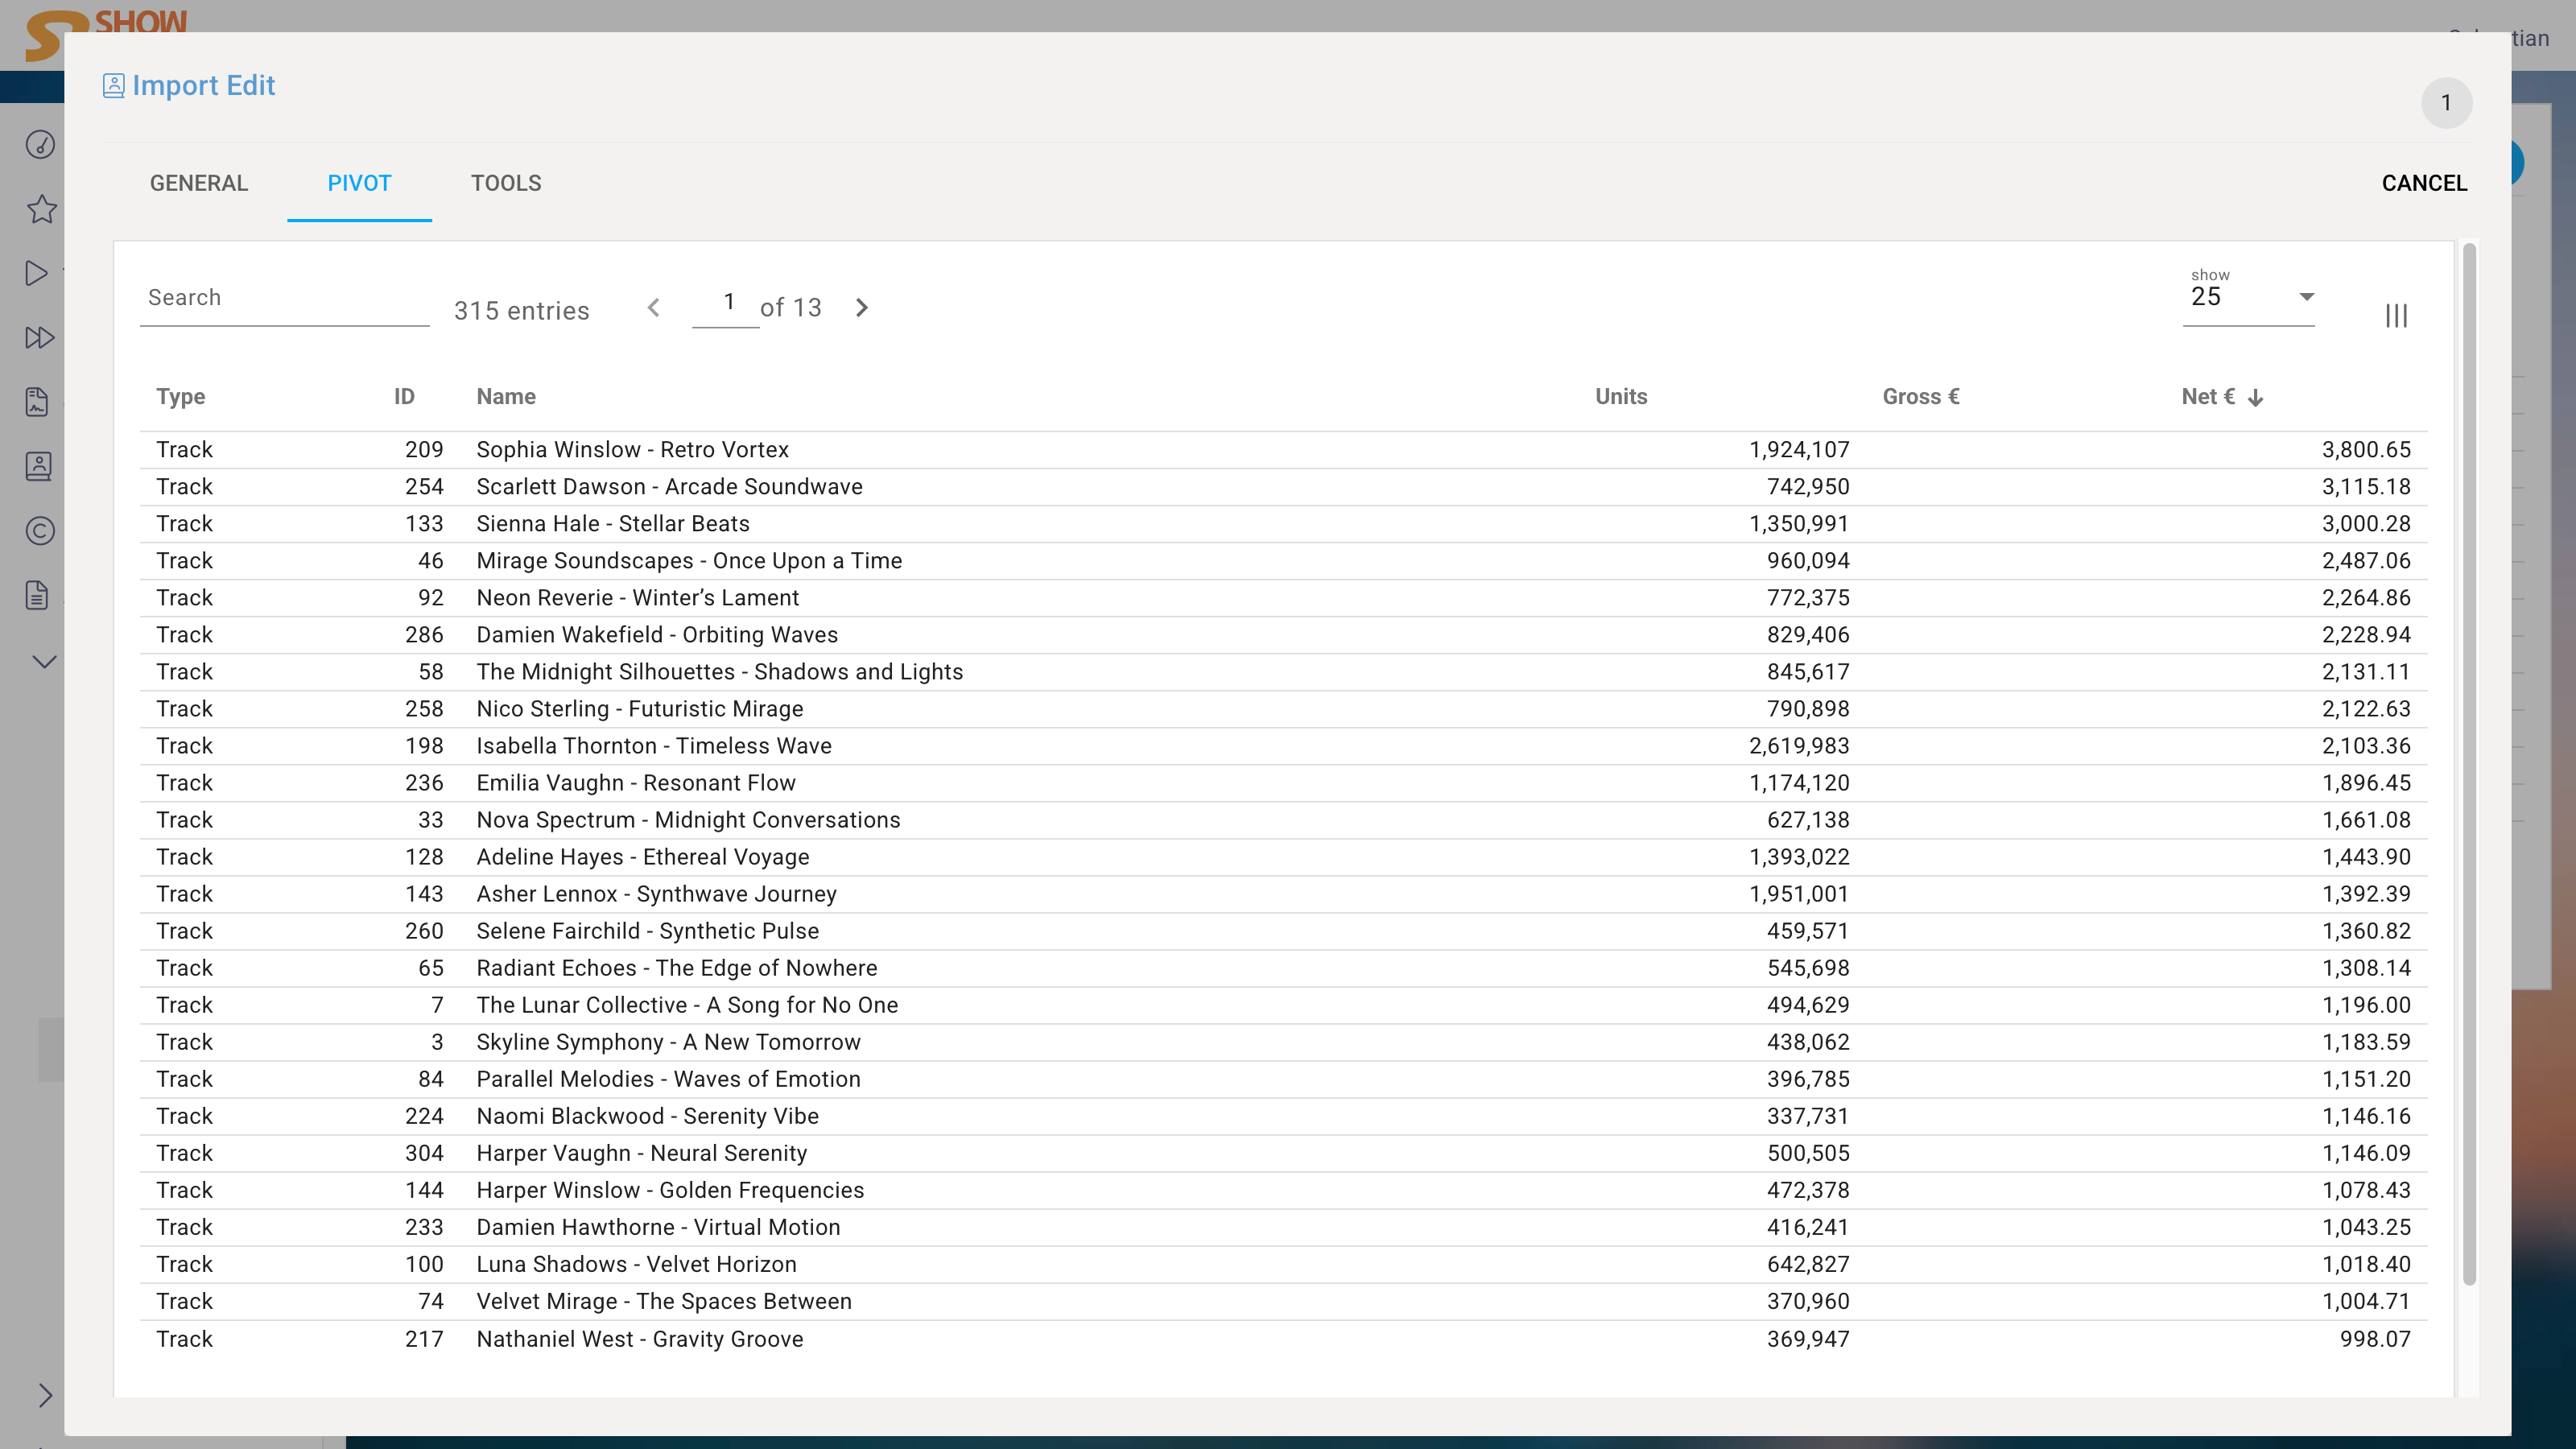
The Pivot table provides a quick overview of sales per Track and Product. This is useful for checking the plausibility of the Import and for reviewing the most important sales figures, although it does not replace actual controlling.